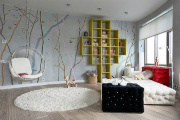


Your bedroom is a sanctuary and you want to make it cozy and stamp it with your personality! But there's no need to spend the big bucks to make your space your own. There are lots of personal touches and simple DIY projects that you can easily make using household items, glue and your imagination. From a few well-placed knick knacks to pretty scented candles to homemade artwork, it's time to get crafty!
DIY Button Art
 Moose button artCourtesy of www.thedailytelecraft.com
There's no need to buy expensive art work or prints from the shop. All you need is a wooden frame, a glue gun and buttons to make your own work of art!
For this project you will need:
- A frame
- Cardstock or stiff paper
- Glue gun and glue sticks
- Assorted buttons
- A ruler
- A pencil and eraser
Instructions:
1. Cut a stiff piece of paper or cardstock to fit your frame.
2. Use the pencil to sketch an outline of whatever you'd like - it can be a cat, block letters, a heart or anything else you'd like.
3. Warm up your glue gun and once you're finished the sketch, use the glue gun and buttons to glue all the buttons to fit the shape you drew. Think of it as coloring in your sketch with buttons! Use all different sizes, colors and styles - the quirkier the better!
 Butterfly button artMoose button art
Make Your Own Bunting or Garland
 Bedroom bunting is super easy to make and will brighten up your bedroom!Courtesy of www.seedsandstitches.blogspot.com
The quickest way to change a room is to add a punch of color. It will add coziness to your space and is a bright and cheery accent that will put a smile on your face. It's festive, colorful and super easy to make - what more could you want?
For this project you will need:
- Stiff cardstock to draw the template on
- Scraps of fabric in any color or pattern
- Scissors
- Glue gun
- Thick grosgrain ribbon
Instructions:
First draw a template on the paper for the triangles. Keep in mind you will need about 30 triangles for 5 metres of bunting/garland. Make the triangles as big or small as you like. Using the cardstock template cut out as many triangles as you can. Warm up the glue gun and glue each triangle to the ribbon at equal distance. Add any embellishment you like - try little pom poms or even a bit of glitter if you like! Mismatched fabrics look best so don't worry about clashing. Hang them up and enjoy!
 Cut out letter to spell out your name to personalize your buntingCourtesy of www.buttonbag.co.uk
DIY Fabric Cork Board
 This DIY fabric cork board will spruce up your room!Courtesy of www.northcarolinacharm.blogspot.com
This DIY fabric cork boardwill instantly perk up your room! Put it over your desk or anywhere on your wall to post concert tickets, favorite photos and notes on it. All you need to do is pick out your favorite fabric - from florals to stripes to cute retro prints - anything goes!
For this project you will need:
- An inexpensive cork board
- Fabric - it needs to be large enough to wrap around and leaves a few inches around the edges
- Staple gun
- Silver thumb tacks
Instructions:
Cover your cork board with fabric, not forgetting to leave several inches or enough fabric to wrap around the back to cover the corners. Take your silver tacks (they can be gold or any color you like) and start pushing them around the border. Once all the tacks are in flip the board over and simply use a staple gun to staple down the fabric on the other side. Hang it up and voila - a pretty cork board to hang your favorite things on!
 Push in tacks all around the border of the frame.Courtesy of www.northcarolinacharm.blogspot.com
 Use a staple gun to secure the fabric at the back of the cork boardCourtesy of www.northcarolinacharm.blogspot.comesy of
Have your say:
What are your favorite DIY or craft projects? Share your tips in the comments below!