There's an old expression that says, "In every summer vacation a little rain must fall." Well, it was something like that. The point is that no matter where you live, the sun is going to take a break every now and again and you're going to have to find a way to occupy yourself. Check out this amazing idea that takes crafting into the realm of high art!
Go Figure - Making Your Own Statue
Ok, maybe you're not quite ready to chisel granite or invest in a kiln. That doesn't mean that you can't sculpt up a storm. You only need a little newspaper, some glue and some fresh ideas, and your peeps will be calling you Michelangelo in no time.
What You Need:
Becoming a Sculptor in 7 Easy Steps:
1. Decide what kind of statue you want to make (a cat, airplane, what-have-you). You can use this method to make big or small statues, but it's probably best to start smaller the first time.2. Cut a shape from the cardboard to make a base. Remember that the base is going to have to be big enough to support your whole sculpture.
3. Scrunch up the newspaper to form the main body of your sculpture and tape that to the base securely. Don't worry about seeing the tape; you're going to paint over it later. Just make sure there are no spaces between the tape and the cardboard. You want this all to be nice and secure.
4. Keep scrunching, twisting and taping pieces of newspaper to form the shape of your sculpture. If something doesn't look right, scrunch, fold and twist it again until it does. This is all about using your own artistic talents, so don't be afraid go with whatever looks good to you. Remember to use a lot of tape.
5. Use pieces of cardboard to give your shark fins, your dinosaur teeth, or your boat sails. Whatever. You can overlap pieces of thin cardboard to give your sculpture texture (like to make scales on a fish). You can also cut, fold or bend the tape to create smaller details, like teeth. Just remember to fold the tape over on to itself a few times to make it thicker and more durable.
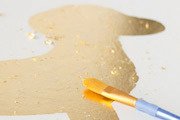
6. When you're happy with the overall look of your sculpture, paint the whole thing with a mixture of paint and glue. Use whatever color you'd like to be the overall base-color of your sculpture. Dark colors work best, but lighter colors will work if you use a few more coats.
7. Once this has all dried, paint on all the details. C'est voila. You're an artist!
Related Stories:


