


January is National Thank You Month! Yep, probably because we spent December getting treats and presents and attending parties and dinners, we need an entire month to thank everyone for their generosity and hospitality.


And now that you have all the wonderful toys and gadgets and holiday wishes that you asked for it’s time to send out your thanks to the people who gave them to you. OK, maybe you didn’t get everything you wanted, but people still put in an effort and got you something. If you put in a little effort and thank them, your manners are bound to impress and might insure a good gift next year!
Here are three easy, quick DIY ideas to show your thanks!
Your Art Thank You Notes:
There’s something about the effort put into a little note that makes it heartfelt. If it’s a homemade note, the better. Even if you don’t consider yourself a great artist think about putting a note together.
Materials:
- Your original artwork: whether it’s a masterpiece or a squiggle of a line.
- Cardboard or Cardstock
- Envelope
- Glue stick
- Marker
Instructions:
- Take your artwork, whether a pencil drawing or watercolor or collage. If the art is a large piece, trim down to notecard sized pieces.
- Mount the artwork on 3 inches by 5 inches folded cards with the glue stick. You can also do postcard style where you write on the back of the note.
- On a smaller strip of paper, write out, “Thanks!” or “Thank You!”
- Glue your little note to the front of the card over your artwork.
- Let dry completely.
- Write your thank you note on the inside or back of the note. Sign it, seal it and deliver!
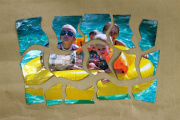
 Your Art Says Thank You for YouCourtesy of doityourselfdivas.blogspot.com
Lego Print Artwork:
Whether inspiration for the thank you note above or simply a card on it’s own, Lego Printing created some unique artwork that is insanely easy to do.
Materials:
- Legos: large or small
- Paint
- Newspaper
- Glue stick
- Cardboard or Cardstock
- Envelopes
Instructions:
- Take your Legos and dip the circular ends into paint.
- Stamp the circular shapes onto your card or a separate piece of paper.
- If you used a separate piece of paper, let the paint dry and cut out shapes of your printing. Then glue them to your card.
- If you printed directly to your card, let the paint dry completely.
- Write your thank you note on the card.
- Deliver your thanks!
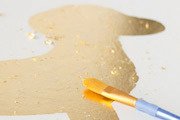
 Lego Print is an Easy Unique Way to Decorate Thank You Notes!Courtesy of theimaginationtree.com
Thank You Bookmarks:
A little place marker for someone’s book is a helpful gift and with your thank you note and artwork, can be a lovely reminder of your gratitude.
Materials:
- Cardstock
- Ribbon
- Hole Punch
- Markers, Crayons or Paint
- Stickers
Instructions:
- Cut a stripe of cardstock or construction paper to a length no longer than 6 inches.
- Punch a hole in one end of the bookmark.
- Decorate the bookmark with colors, paints, stickers, glitter for the person you’re sending it to. Think about what they like. See above for Lego printing!
- Write a little thank you note on the back of the bookmark.
- Tie a ribbon through the hole at the top of the bookmark.
- Send it along to the lucky recipient!
 Thank You Bookmarks Will Remind Them of Your GratitudeCourtesy of intimateweddings.com
Your Thank You Note should always mention the gift you received and what you’ve done with it. If you didn’t enjoy the gift then maybe shy away from that and just thank them for their effort and generosity. Thank you notes don’t have to be long; a little thank you goes a long way.
Have Your Say!
Do like to recieve a thank you note, or does it seem overkill? Share your opinions in the comment’s section below!